Machines
The Machines page is where you create and manage virtual machines.
In order to be able to create a machine, you need to have access to a virtual datacenter.
Within the End User Portal you can discover to which virtual datacenters you have access by clicking the second link in the top menu bar.
In the below screenshot for example you can see that the logged in user has access to several datacenters, of which two of them created in the 'Account of Yves':

In order to have access to other virtual datacenters, or in order to create a new virtual datacenter, you will need to contact a user with administration rights to a cloud account.
Once you have selected a virtual datacenter, you can navigate to the Machines page for that virtual datacenter, by clicking the Machines icon or clicking Machines in the right navigation menu:

In the below screenshot you see that no virtual machines have been created yet in the demo-vdc virtual datacenter:

Create a new Machine
Clicking Create Machine allows you to add a virtual machine to the virtual datacenter.
Give your machine a name:

Select an o/s image:

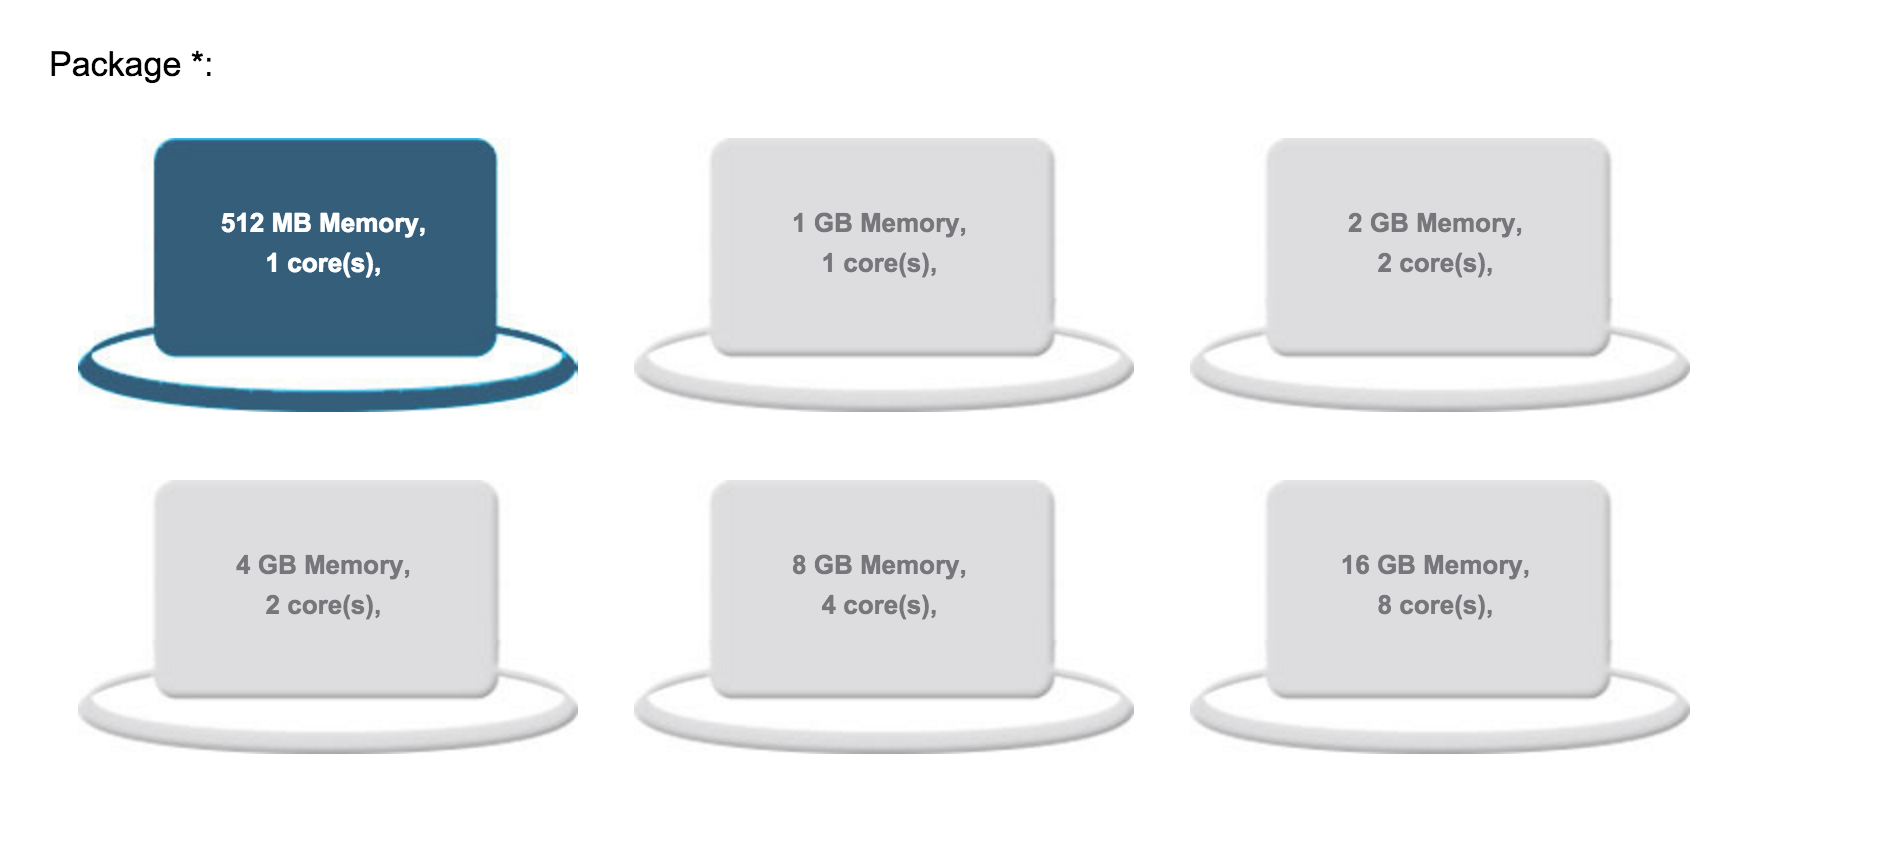
Choose one of the predefined machines packages:

And finally select the size of the boot drive:

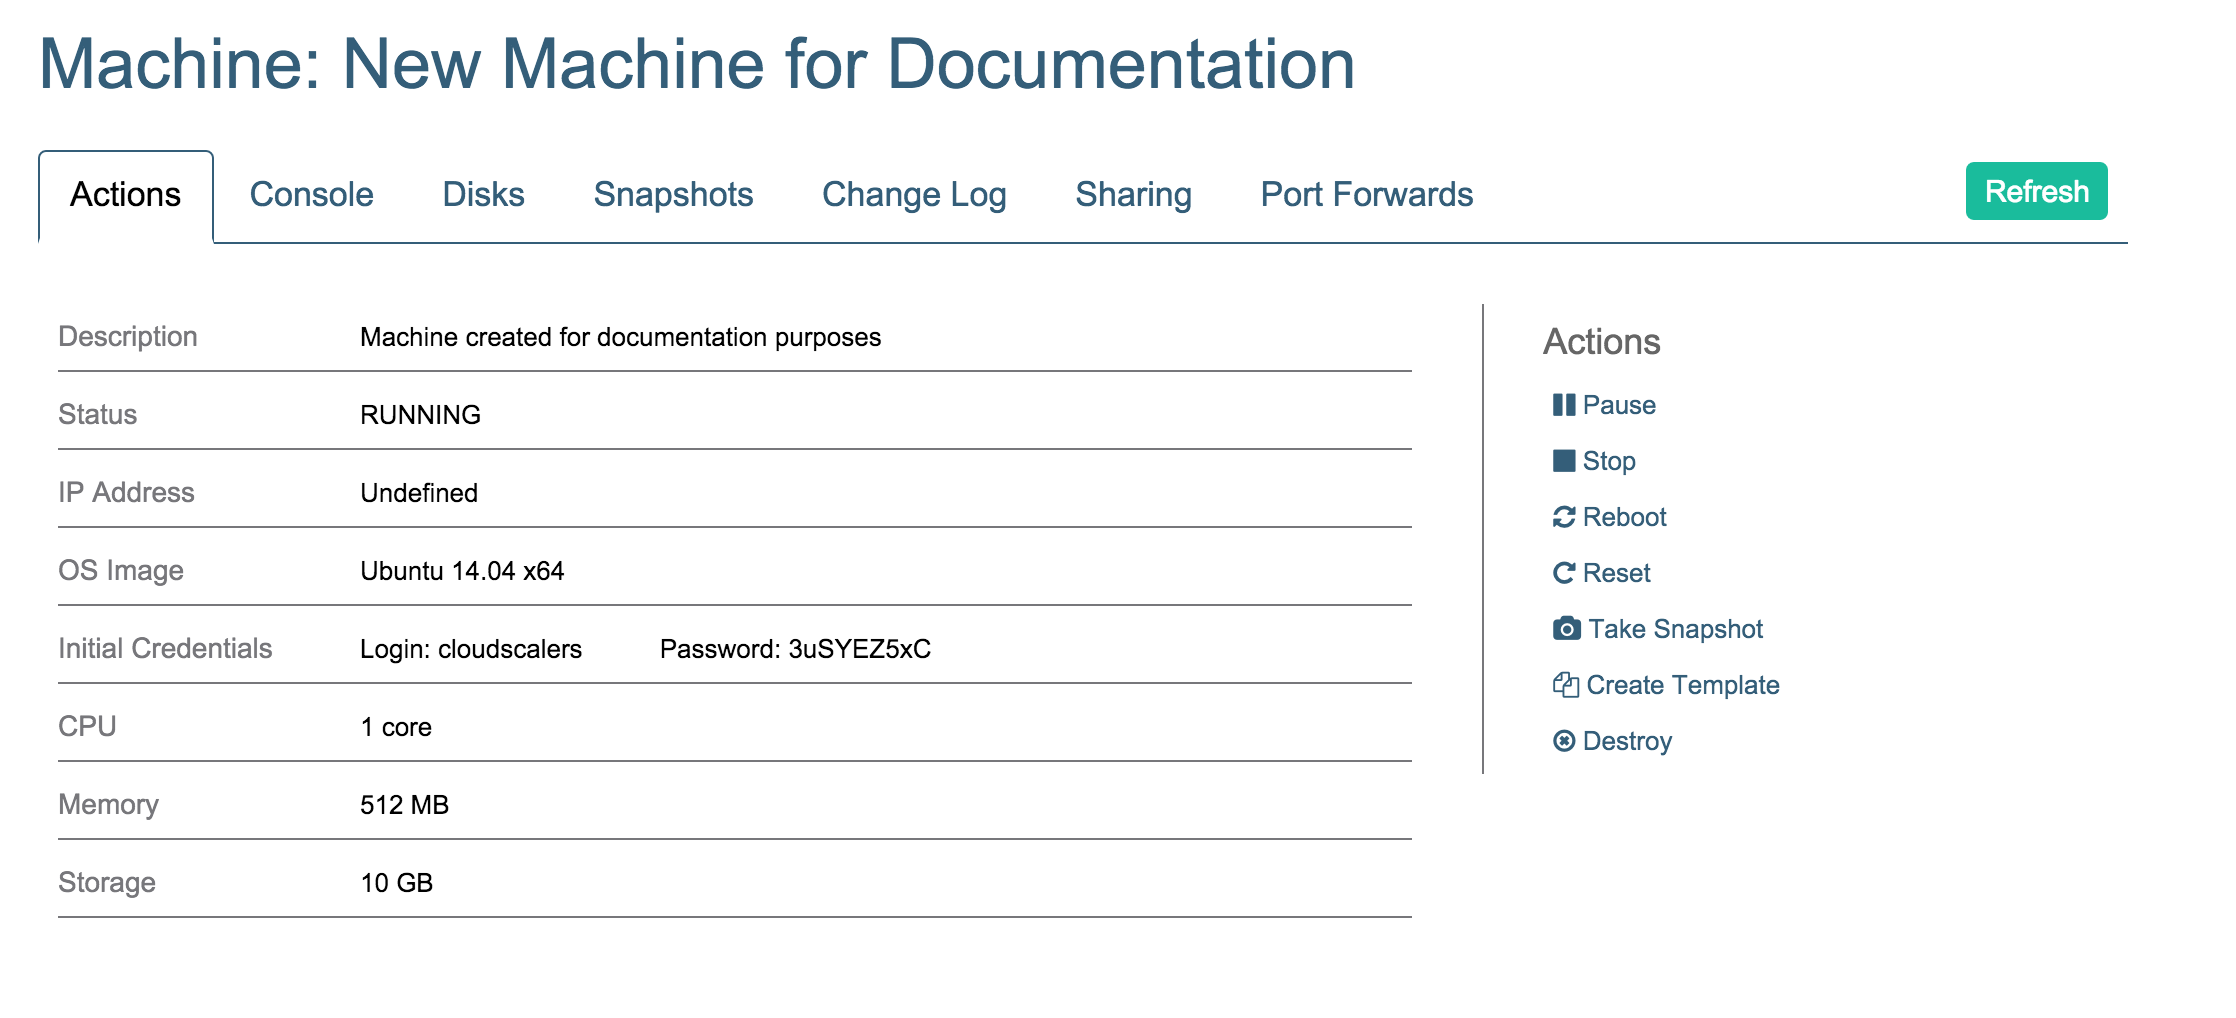
As a result you will see this:

Actions
The above screenshot shows the Actions tab of you newly created machine.
Here you can:
- Pause
- Stop and Start
- Reboot
- Reset
- Take Snapshot
- Destroy
Console
From the Console tab you can login to your virtual machine:

You will want to use the very handy paste buttons for the username and initial password.
Disks
On the Disks tab you get add extra data storage to your virtual machine via the Create disks subtab:

Below the result after having added two 50 GB disks:

Snapshots
Creating snapshots is easy, simply click Take Snapshot on the Snapshots tab.
Below a screenshot after having created two snapshots:

You can roll back to any of your snapshots or delete a snapshot by clicking one of the actions next to your snapshots.
Change Log
An history of the changes to your virtual machine is shown on the Change Log tab:

Sharing
In the Sharing tab you can manage who has access to your virtual machine:

A user can either have Read, Read/Write or Admin privileges.
Port Forwards
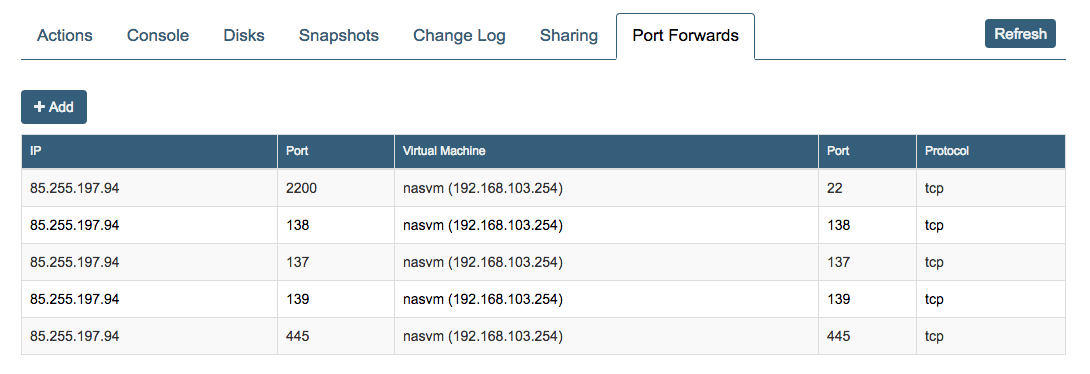
On the Port Forwards tab all the Port Forwards for your virtual machine are listed:

Adding a port forwarding is simple, just click Add and specify the source and destination ports:
