Cloud Spaces
A cloud space is logical grouping of cloud resources, commonly referred to as a tenant.
Each cloud space is associated with one, and only one account. Per account you can have one or more cloud spaces, that are all associated with the same account.
The Cloud Spaces page lists all cloud spaces:
![[]](CloudSpaces.png)
From there you can navigate to the Cloud Space Details page of a specific cloud space:
![[]](CloudSpaceDetails.png)
From the Actions dropdown on the Cloud Space Details page you can choose to:
- Edit the cloud space name and capacity limitation properties
- Deploy VFW in order to deploy the virtual firewall (VFW) (if not active already, since this normally happens automatically)
- Delete the cloud space
For each new cloud space a private network (including a virtual firewall) is automatically created, shared by all virtual machines in that cloud space. In the Details section of the Cloud Space Details page this private network is referenced with its Network ID. When you click this Network ID you navigate to the Private Network Details page for that cloud space:
![[]](PrivateNetworkDetails.png)
Here you also see the Management IP Address and the Public IP Address for the cloud space, as well as all active port forwardings on that private network; discussed below.
Cloud Resource Limits
Here the total available cloud capacity is show.
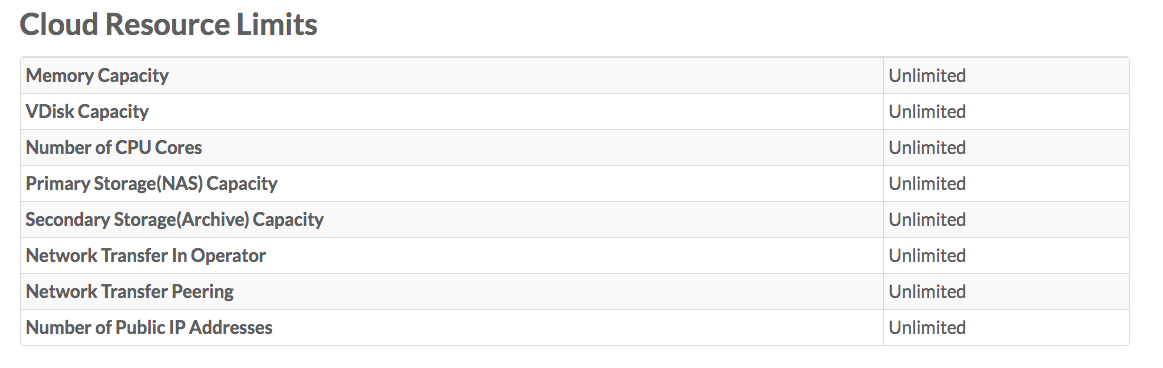
In order to change the limits you need to select Edit from the Action dropdown menu.
User Access
In the Users Access section you see all the users with access to the cloud space:
![[]](UsersAccess.png)
By clicking the + Grant User Access link you can grant other users to the cloud space:
![[]](GrantUserAccess.png)
A user can have read, write or admin privileges. See the End User Portal Authorization Model documentation for all details on this.
Port Forwards
In order to make virtual machines on the cloud space publicly accessible you will need to set-up port forwards from the public network to the private network.

Clicking + Add Port Forward allows you to add Port Forwards:

Virtual Machines
In the Virtual Machines table all virtual machines running in the cloud space are listed.
![[]](VirtualMachines.png)
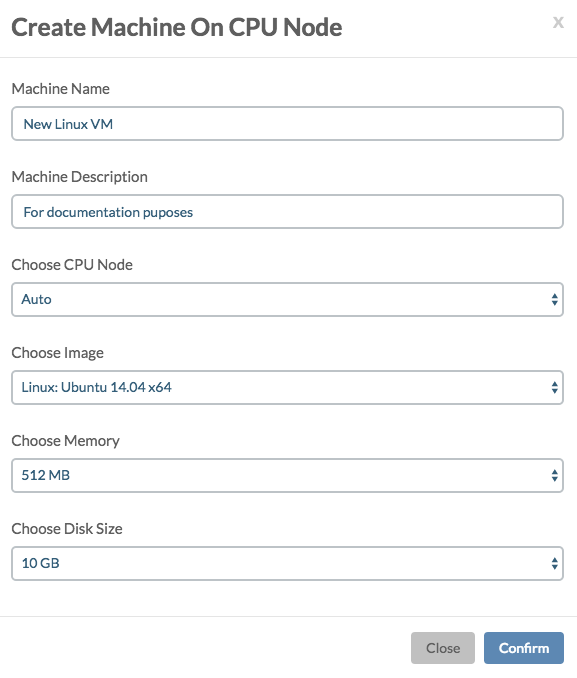
Click the + Add Virtual Machine in order to add a new virtual machine in the cloud space which will pop-up the Create Machine On CPU Node window:
Click the + Import Virtual Machine in order to import a new virtual machine in the cloud space which will pop-up the Import Machine window:
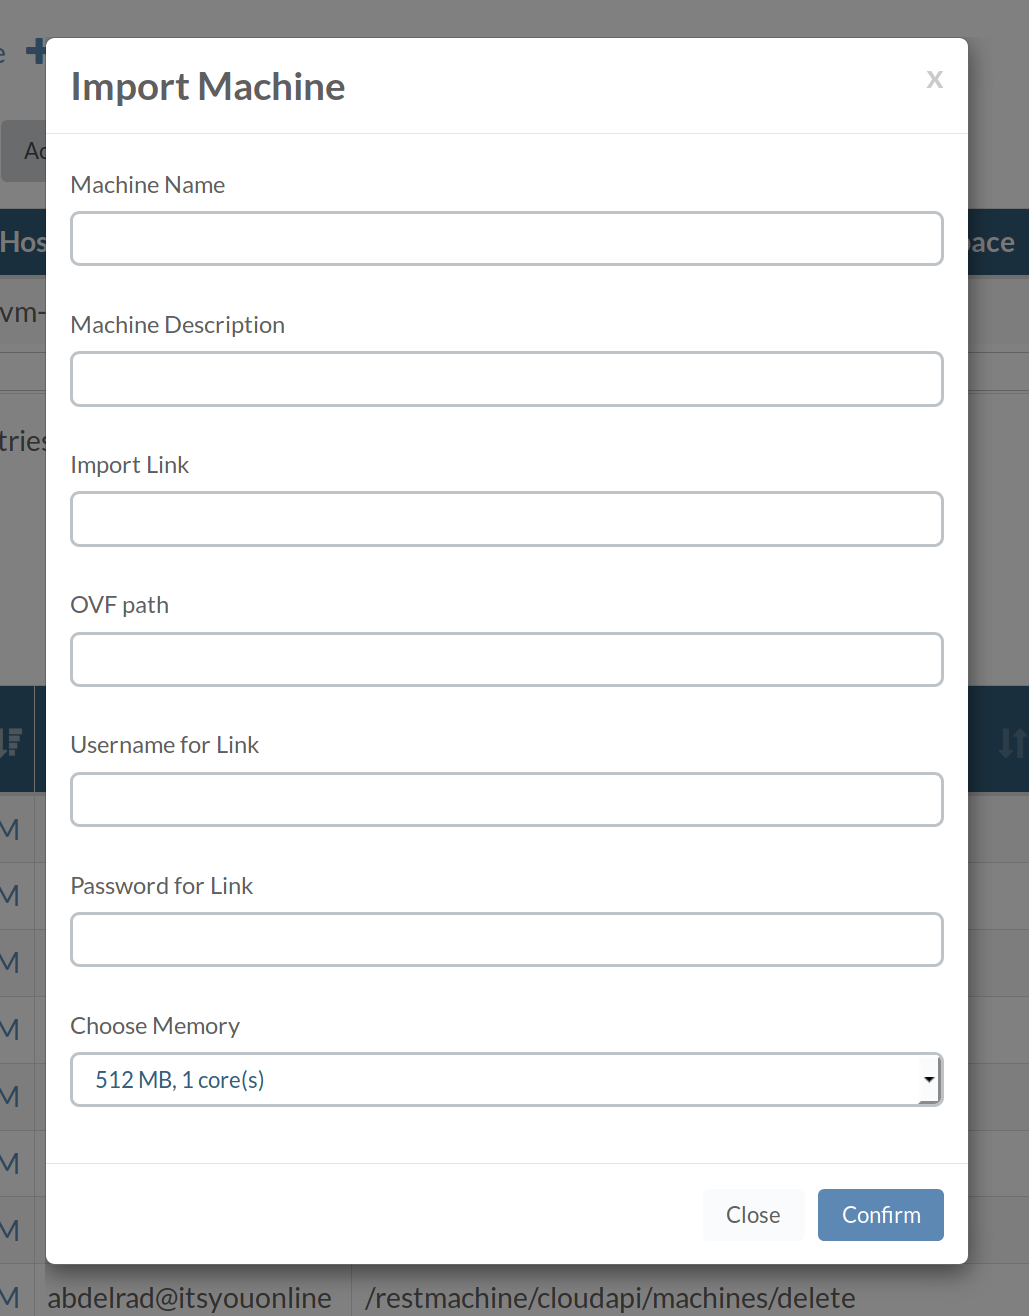
Form data:
- Machine Name: New name for the machine to import
- Machine Description: Description for new machine
- Import Link:
HTTP(S)link to your WebDAV server - OVF Path: Path toward the directory on your WebDAV server where the export data lives
- Username for Link: Username for your WebDAV server
- Password for Link: Password` for your WebDAV server
- Memory: Choose the memory you would like to assign to your new machine