Installation of a Cockpit
A Cockpit can be installed in two modes:
Both are discussed here below.
Once installed you will want to make sure that your Cockpit can push changes back to your Git server, as discussed here below
Installing a Cockpit in Development Mode
Installing a Cockpit for development purposes can be achieved in two ways:
In both cases realize that for a Cockpit in development mode:
- Oauth is disabled for both the Cockpit Portal and the Cockpit Engine
- Everything will be installed locally (all configurations will assume local)
- You'll get the latest of the branch you're installing from, not the latest stable build, so proceed with caution
- Part of the installation pulls in the most recent code, make sure the required code is committed first
Installing a Cockpit in Production Mode
There are two ways to install a new production Cockpit:
Both options requires some pre-installation preparation, documented here.
Allow the Cockpit to push to your Github repository
The last thing you need to do is enabling your Cockpit to save all AYS services information into your GitHub repository.
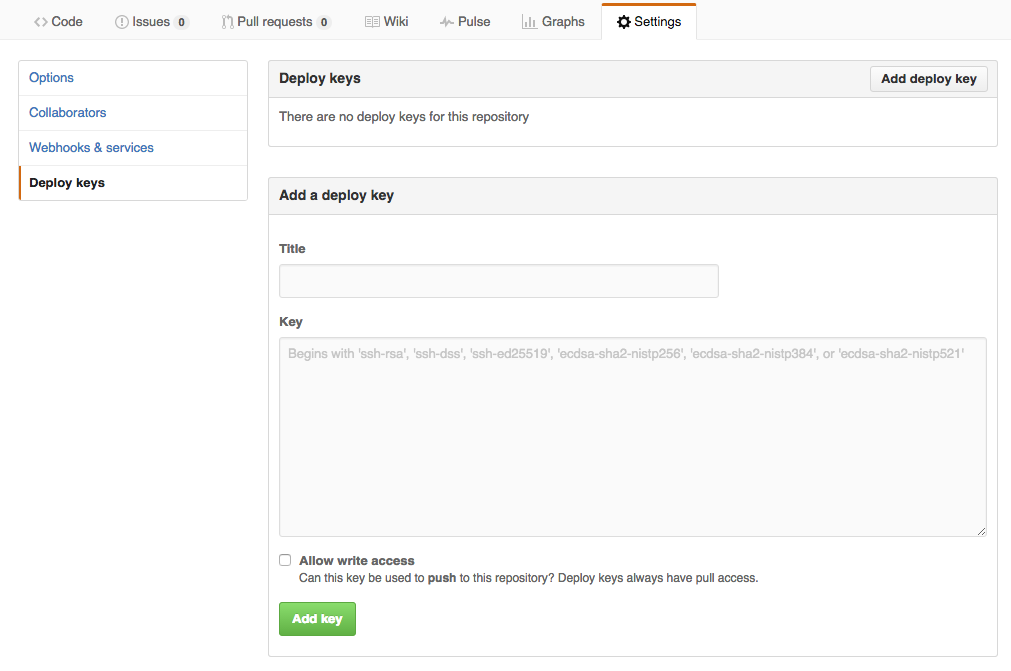
This is achieved by adding the deploy key generated by the Cockpit to the deploy keys of your GitHub repository:
- Go to the Settings page of the GitHub repository specified during installation
- Click Add deploy key in the Deploy keys tab
- Copy the content of the public key that you can find in the Information page of your Cockpit Portal:

- Select Allow write access and click the Add key button